> For the complete documentation index, see [llms.txt](https://docs.tempoweave.com/llms.txt). Markdown versions of documentation pages are available by appending `.md` to page URLs; this page is available as [Markdown](https://docs.tempoweave.com/help-by-menu-tabs/project-menu/float-check.md).
# Float Check
*Available on Desktop and Mobile.*
### What Is a Float?
A float is a length of yarn that passes over or under multiple threads without interlacing. Every weave structure has floats — a plain weave has floats of 1 (each thread goes over one, under one), while a 2/2 twill has floats of 2. Long floats can cause problems: they snag easily, reduce fabric strength, and may make the cloth unsuitable for its intended use.
Float Check scans your entire draft and finds every float that exceeds a length you specify, so you can identify and fix potential problems before you start weaving.
***
### Opening Float Check
{% tabs %}
{% tab title="Desktop" %}
* **Ribbon**: Project tab > Float Check button
* **Keyboard**: Ctrl+F (Cmd+F on macOS)
Float Check opens as a non-modal dialog, meaning you can keep it open while continuing to work on your draft.
{% endtab %}
{% tab title="Mobile" %}
* Tap **Tools** on the rail (tablet) or the bottom dock (phone), then **Float Check…** under Analysis
{% endtab %}
{% endtabs %}
***
### How to Use It
#### Step 1: Set Your Parameters
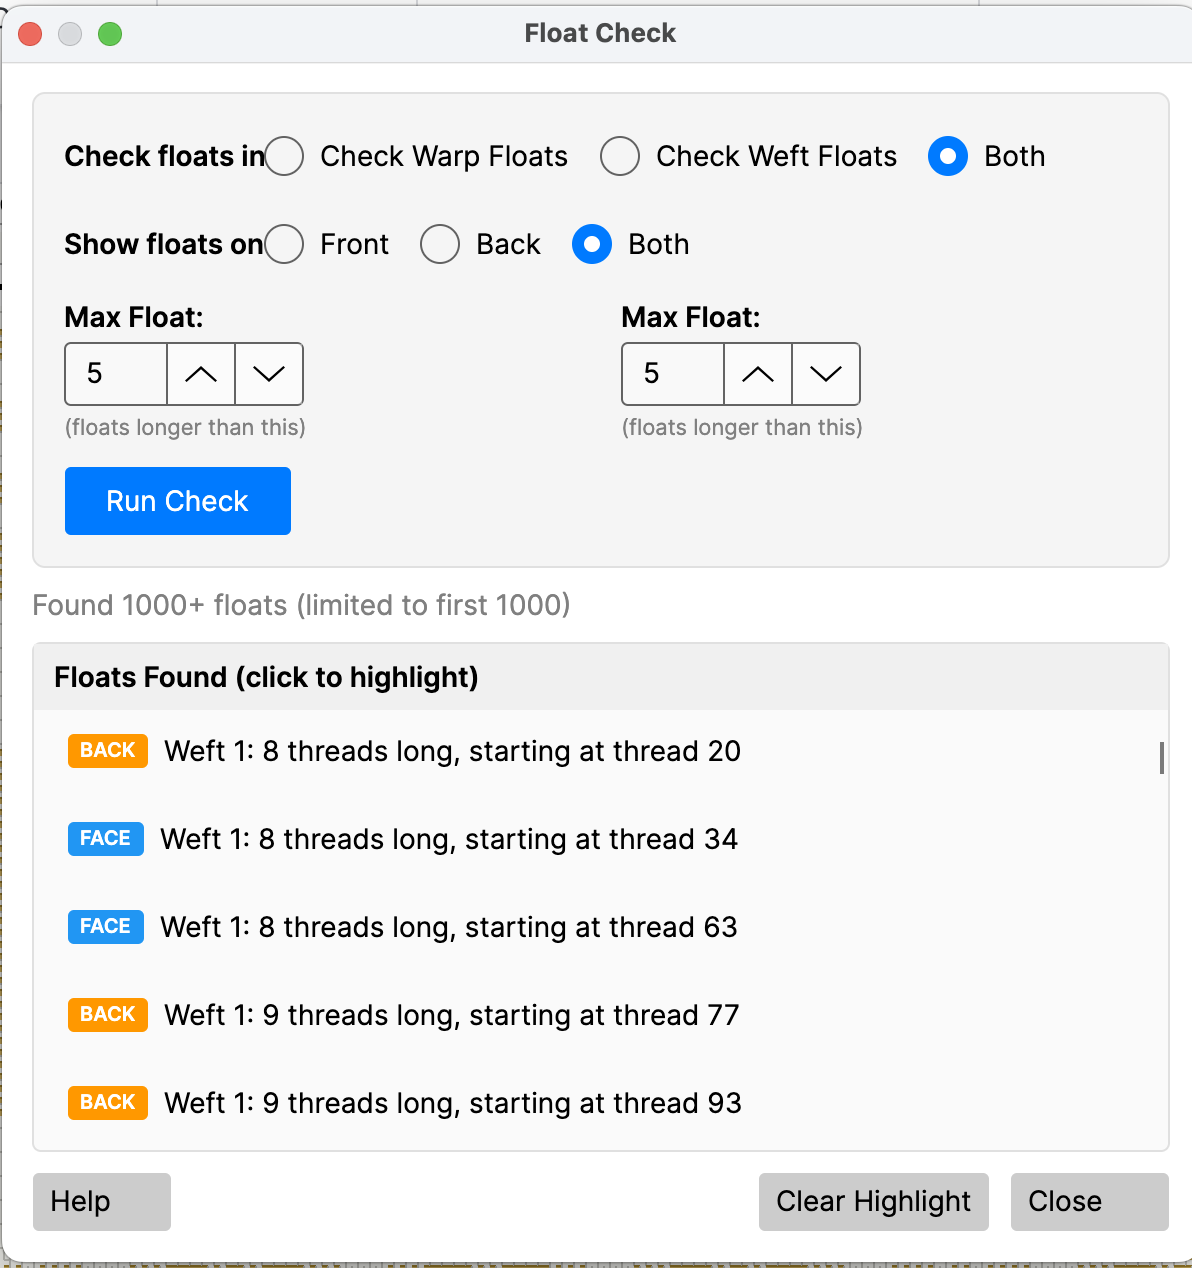
At the top of the dialog you'll find the settings panel:
**Direction**
* **Check Warp Floats** — Only looks for floats running vertically (warp threads passing over multiple picks)
* **Check Weft Floats** — Only looks for floats running horizontally (weft yarn passing over multiple warp threads)
* **Both** — Checks in both directions (default, recommended)
**Cloth Side**
* **Front** — Only shows floats visible on the face of the fabric
* **Back** — Only shows floats visible on the back
* **Both** — Shows floats on both sides (default, recommended)
**Maximum Float Lengths**
Two separate controls let you set different thresholds for warp and weft:
* **Max Warp Float** — Warp floats longer than this will be flagged (default: 5)
* **Max Weft Float** — Weft floats longer than this will be flagged (default: 5)
You can set these anywhere from 2 to 100. Only floats that exceed your threshold are reported — floats at or below the threshold are considered acceptable.
#### Step 2: Run the Check
Click the **Run Check** button. TempoWeave scans your entire cloth and reports the results immediately.
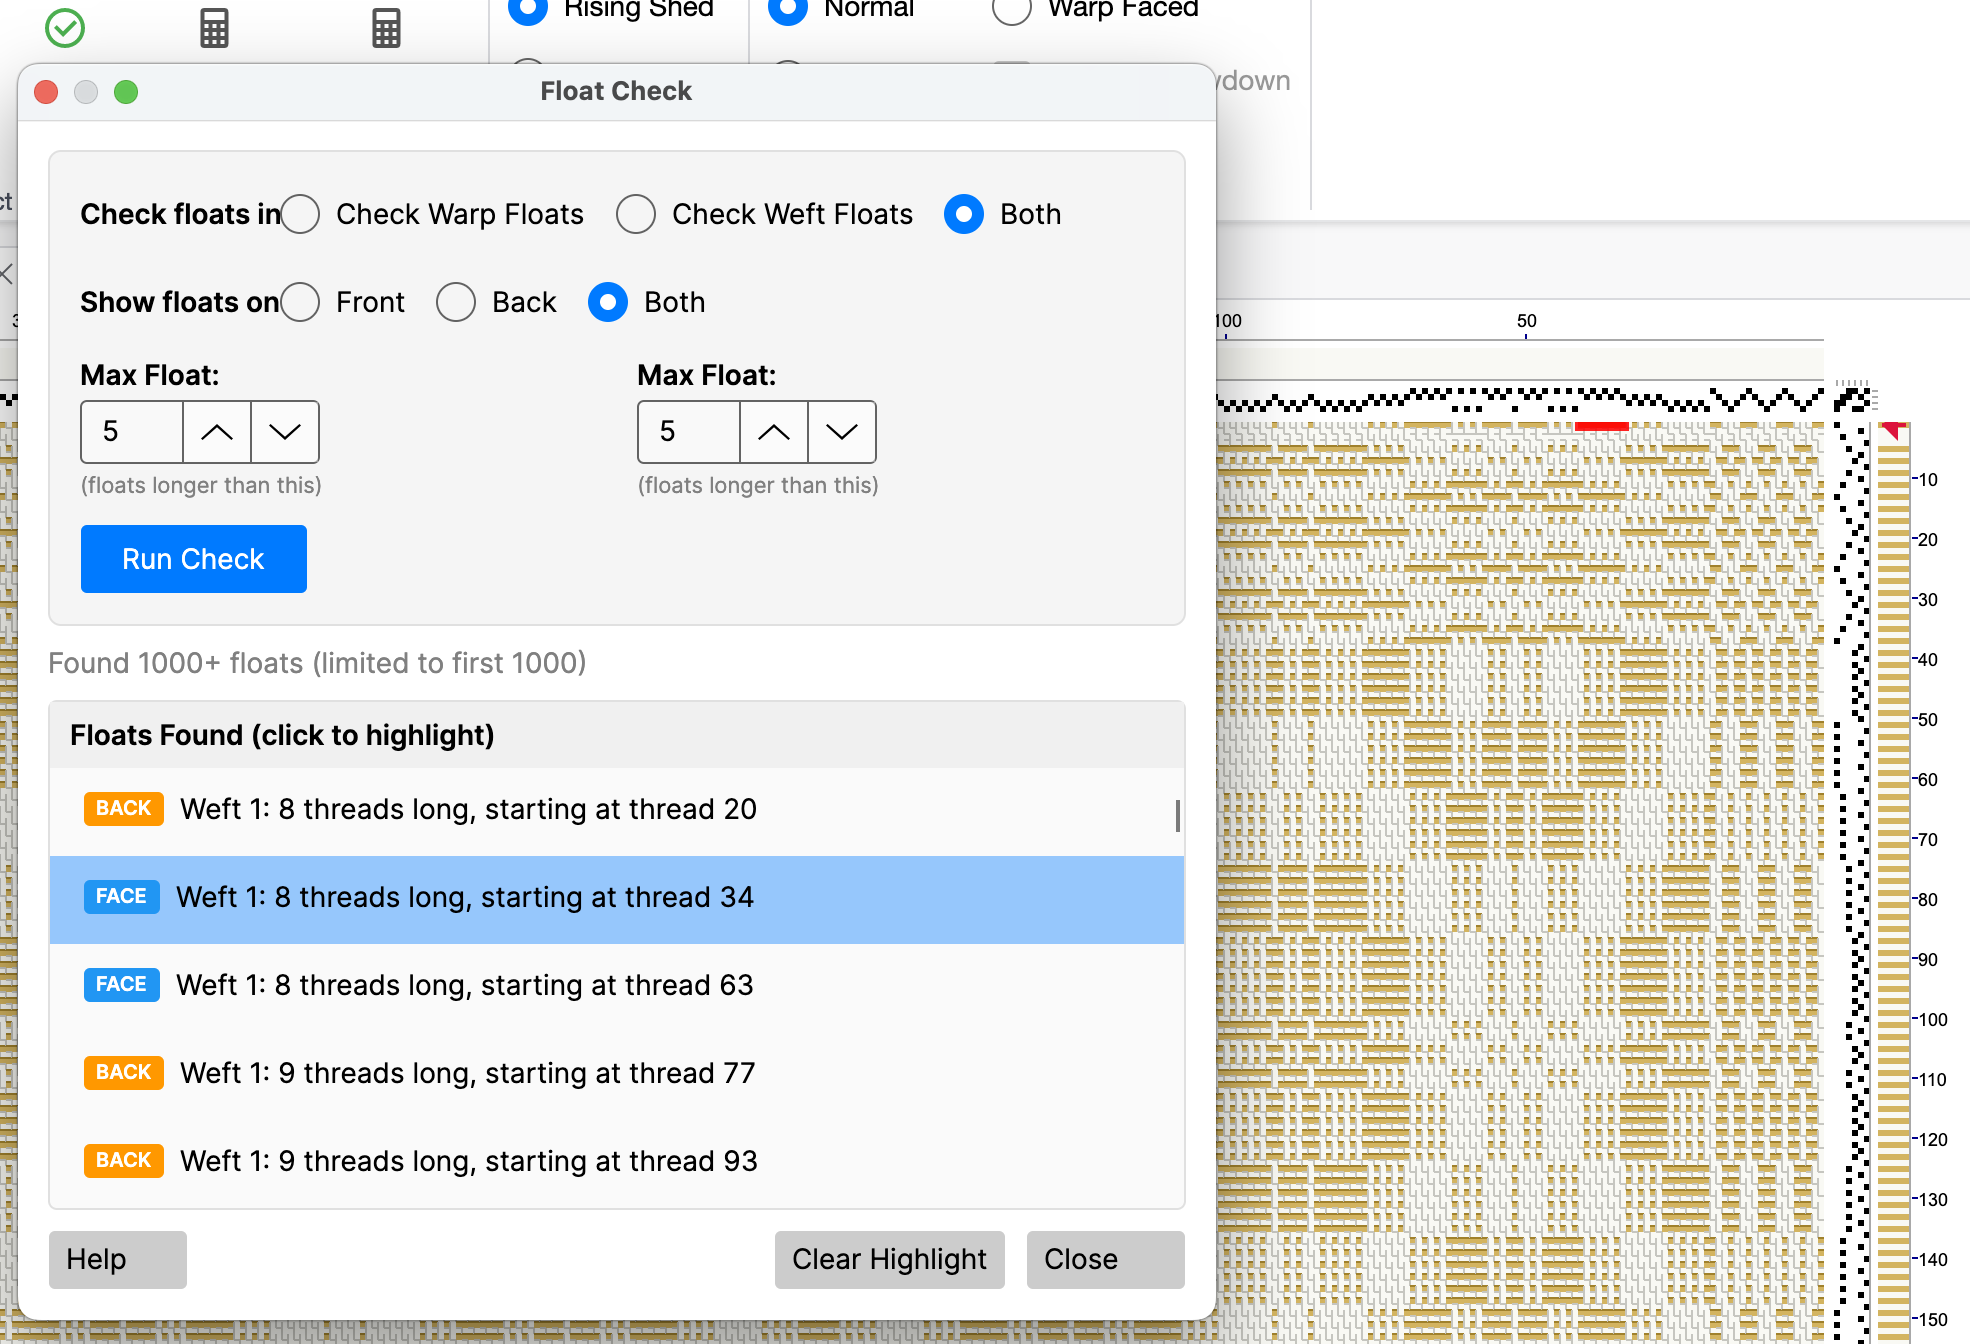
Float Check - Highlighting with Red in the Draft
#### Step 3: Review the Results
The summary line tells you how many floats were found. If none exceed your thresholds, you'll see:
> "No floats found exceeding the specified lengths."
If floats are found, they appear in a scrollable list below. Each entry shows:
* **A colored badge** indicating which side of the cloth:
* **FACE** (blue) — This float is visible on the front of the fabric
* **BACK** (orange) — This float is visible on the back
* **A description** with the exact location and length:
* For warp floats: "Warp 47: 8 picks long, starting at pick 12"
* For weft floats: "Weft 23: 6 threads long, starting at thread 85"
#### Step 4: Navigate to Problem Areas
**Click any float in the list** and TempoWeave will:
1. **Scroll the drawdown** to bring that area into view
2. **Highlight the float** with a semi-transparent red overlay so you can see exactly which threads are involved
3. **Show a red arrow** in the warp or weft color bar pointing to the specific thread or pick
This makes it easy to find and fix each problem area in your draft.
#### Step 5: Clear and Close
* **Clear Highlight** — Removes the red highlight from the canvas without closing the dialog (useful when moving on to the next float)
* **Close** — Closes the dialog and automatically clears all highlights and arrows
***
### Understanding Face vs. Back Floats
Every float exists on one side of the cloth:
* A **face warp float** means a warp thread is sitting on top of the fabric surface for multiple picks — visible to anyone looking at the front
* A **back weft float** means the weft yarn is passing behind the fabric for multiple threads — only visible if you flip the cloth over
Why does this matter? A long float on the back of a placemat might be acceptable since it sits on the table. The same float on the face would snag on dishes and silverware. Checking both sides lets you make informed decisions about which floats to fix.
***
### What Float Lengths Are Acceptable?
There's no universal rule — it depends on your project and yarn. The built-in Help button provides these guidelines:
| Project Type | Suggested Maximum Float |
| ------------------------------------ | ------------------------------ |
| Tabletop items (placemats, runners) | 5–7 threads |
| Garments (scarves, shawls, clothing) | 3–5 threads |
| Rugs and heavy-use items | Longer floats can be tolerated |
| Slippery yarns (silk, rayon, Tencel) | Keep floats shorter than usual |
**Tip:** Start with the default of 5 for both warp and weft. If you're working with slippery yarn or making something that will get heavy use, tighten it to 3 or 4. If you're making a decorative wall hanging, you might loosen it to 7 or 8.
***
### Tips for Fixing Long Floats
When Float Check finds a problem, here are common ways to fix it:
#### Adjust the Tie-Up
The tie-up is usually the root cause of long floats. Look at which shafts are raised (or lowered) for the treadle that's causing the float, and add or remove a connection to break up the long run.
#### Change the Threading
If the float occurs because too many consecutive warp threads are on the same shaft, consider rearranging the threading to distribute them differently.
#### Add a Tabby Pick
For pattern weaves like overshot, inserting a plain weave (tabby) pick between pattern picks breaks up long weft floats. Use the **Add Tabby** tool (Tools tab, Tabby group) to do this automatically.
#### Accept It Knowingly
Not all long floats need fixing. Satin weaves intentionally use long floats to create their smooth surface. The key is making sure you know about them and have decided they're acceptable for your project.
***
### Results Limit
For performance reasons, Float Check reports a maximum of 1,000 floats. If your draft has more than that, the summary will show "Found 1,000+ floats (limited to first 1000)." Fix the reported floats first, then run the check again to find any remaining ones.
***
### Quick Reference
| Setting | Default | Range | Purpose |
| -------------- | ------- | ------------------- | --------------------------------- |
| Direction | Both | Warp / Weft / Both | Which floats to check |
| Cloth Side | Both | Front / Back / Both | Which side to report |
| Max Warp Float | 5 | 2–100 | Flag warp floats longer than this |
| Max Weft Float | 5 | 2–100 | Flag weft floats longer than this |
Click to select one of the float notifications, and the corresponding float will be highlighted in red as shown below.